Toyota 4Runner: Disassembly
DISASSEMBLY
PROCEDURE
1. REMOVE REAR NO. 1 SPOILER PROTECTOR

(a) Remove the rear No. 1 spoiler protector.
2. REMOVE REAR NO. 2 SPOILER PROTECTOR
HINT:
Use the same procedure to remove the rear No. 2 spoiler protector on the other side.

(a) Remove the rear No. 2 spoiler protector.
3. REMOVE REAR SPOILER PROTECTOR LH
HINT:
Use the same procedure to remove the rear spoiler protector on the other side.
(a) Remove the rear spoiler protector.
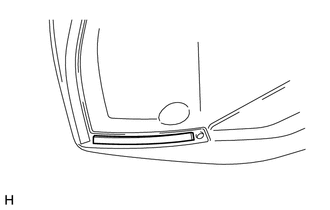
4. REMOVE CENTER STOP LIGHT ASSEMBLY
.gif)
5. REMOVE NO. 3 BACK DOOR WIRE

(a) Detach the clamp and remove the No. 3 back door wire.
 Removal
REMOVAL
PROCEDURE
1. REMOVE REAR NO. 1 SPOILER COVER
(a) Detach the 4 clips and remove the rear No. 1 spoiler cover.
2. REMOVE REAR SPOILER SUB-ASSEMBLY
(a) Remove the 4 grommets and ...
 Reassembly
REASSEMBLY
CAUTION / NOTICE / HINT
HINT:
When installing the rear spoiler protector, heat the rear spoiler surface using
a heat light.
Standard:
Item
Temperature
...
Other materials about Toyota 4Runner:
How To Proceed With Troubleshooting
CAUTION / NOTICE / HINT
HINT:
Use these procedures to troubleshoot the tire pressure warning system.
*: Use the Techstream.
PROCEDURE
1.
VEHICLE BROUGHT TO WORKSHOP
NEXT
...
Diagnosis System
DIAGNOSIS SYSTEM
1. DESCRIPTION
(a) When troubleshooting On-Board Diagnostic (OBD II) vehicles, the vehicle must
be connected to the OBD II scan tool (complying with SAE J1987). Various data output
from the vehicle's ECM can then be read.
(b) OBD II ...

0.0269